If you have a cat, you know that sometimes his instincts push it to eat green eatable-looking plants, whatever they are, and whatever the consequences may be.
Spoiler: most of the time, it will require manual cleanup by the humans that happen to inhabit the same place.
It happens such a cat is living at my place.
And the Cat is often tempted by a plant which is not good for him.
So a solution had to be thought, as having a cat rejecting his stomach contents while you are in a middle of a meeting as you are working remotly from home is often a distractor not only for you but for your colleagues.
As a bonus, the device we would end up building could be used to prevent the cat from accessing other forbidden parts of the house, for example tables, kitchen hot plate..
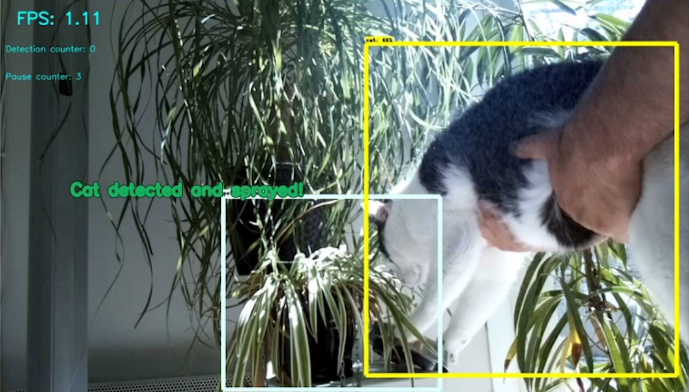
End result
Let’s break the habits of this blog, and show end results first!
Recognize the Cat
Idea is to use tensorflow/OpenCV on a cheap raspberry 3B+ to detect the cat.
You can also follow this excellent tutorial on how to install tensorflow on the raspberry: https://github.com/EdjeElectronics/TensorFlow-Object-Detection-on-the-Raspberry-Pi
Some adaptations were required to get it to work, do not hesitate to contact me or post a comment here if you need help.
Simplest SSDLite MobileNet (which has learnt at 320×240) model was used so that it could run on the RP3B+, of course with « real » PC or a RP4 you could consider using one of the higher-res models available (check https://github.com/tensorflow/models/blob/master/research/object_detection/g3doc/tf2_detection_zoo.md).
After some tests, it appeared this model gave many false positives for categories others than cat, in particular « person » detection.
However, no false positives seen for the cat category, and some false negatives.
So that’s good enough to start plugging that detector to real-life world.
The link to the real world
After having thought of putting some electronics/motor in a cheap, plastic water spray I already owned, similar to that:

I realised implementation would take time, multiple 3d-printing iterations (I have not seen any prior art in thingiverse) and my 3dprinter requiring maintainance + having little time to dedicate to that presently, I decided to go for another solution.
I also considered other similar experiments seen on the web such as that one: https://www.iot-experiments.com/cat-water-spray/ but I preferred to use an easy-to-refill solution.
After searching a bit, I found this cheap electric water spray on Aliexpress (https://a.aliexpress.com/_An5jYW) :
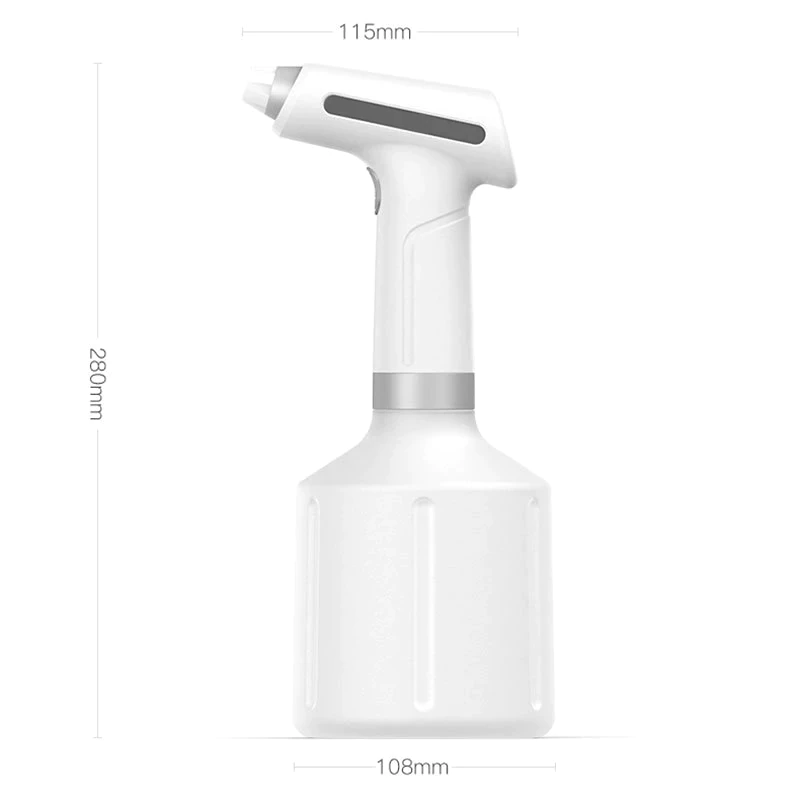
Which – I imagined- would be easy to hack so that it could be controlled by the raspberry GPIOs rather than the original push button.
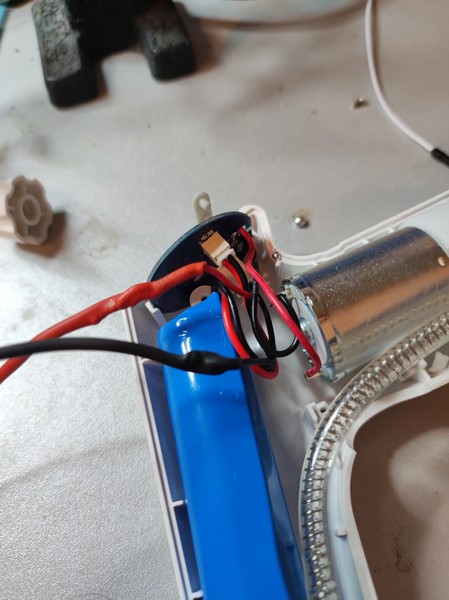
Step 1: Open the spray
Be careful with screws hidden below the plastic adhesive on the sides of the spray.
Then just use common sense to remove parts carefully, you should end up with that:
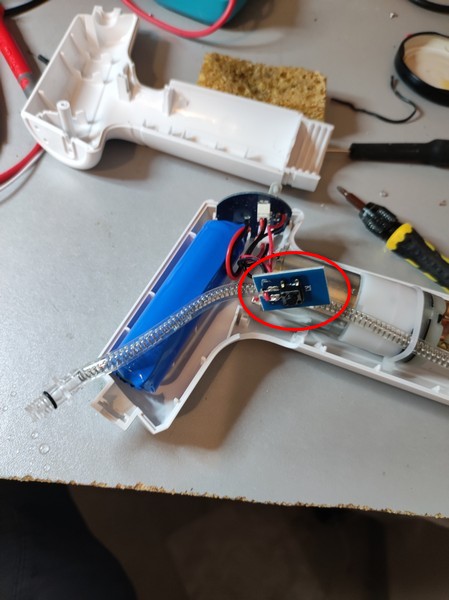
As you can see, one can easily see the button switch located in a dedicated PCB, link to the main logic PCB with black and red wires. Both wires are shortcut when button is pressed.
So we need to simulate that shortcut.
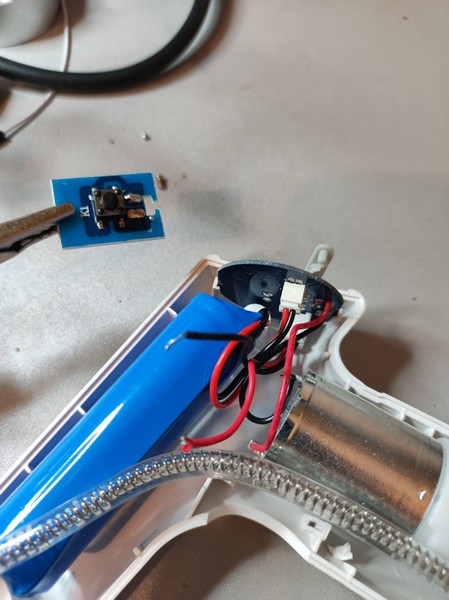
Extend wires
First, let’s get rid of the button part, to this end you can just unsolder the two wires. This option is preferable to cutting, as wires will be longer, which will be easier to handle what comes next.

How to simulate shortcut with the Raspberry
So several options were considered:
- using a relay

+ : easy to put in place, very good isolation
– : noisy when it operates, overkill for our application (very low current/voltage), not the least expensive, takes place (it’s big)
- using optocouplers

+ : very strong decoupling/isolation, quiet
– : not the least expensive,
- using transistor
– : not the best isolation, but works fine in our case as we play with small voltage (the voltage difference between the 2 pins to shortcut from the spray is <5v
+: very cheap, quiet, easy to put in place, small form factor
So the big winner is the transistor.
I happened to have NPN transistors available, S8050 specifically (http://media.nkcelectronics.com/datasheet/s8050.pdf)
And here is the simple circuit:
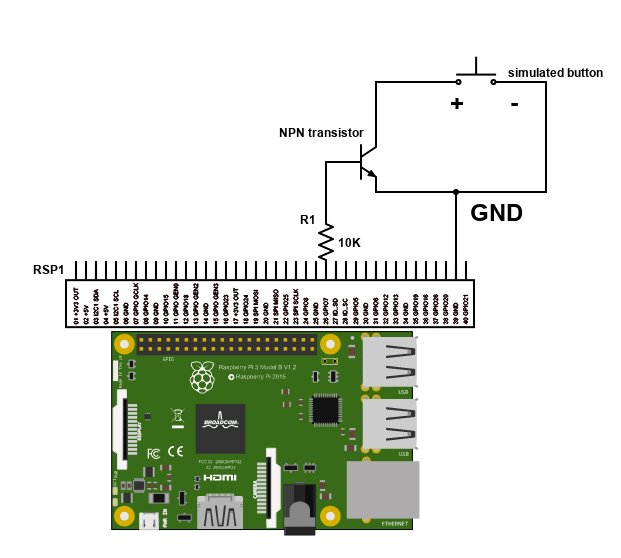
I used GPIO 26 here, just make sure you put a 1K to 20K resistor to limit the current on GPIO pin (<10 mA, 3.3V TTL level voltage as a reminder).
« + » voltage of the spray has to be connected to the transistor collector.
« – » side of the spray has to be connected to the common ground (emitter of the transistor).
GPIO has to be programmed as OUTPUT, of course, here is a minimalistic python program to test it:
pi@raspberrypicam:~/soft/gpiotest/mytest $ cat mytest.py
import RPi.GPIO as GPIO
import time

port = 37
GPIO.setmode(GPIO.BOARD)
GPIO.setup(port, GPIO.OUT)

print("high")
GPIO.output(port, GPIO.HIGH)
time.sleep(2)
print("low")
GPIO.output(port, GPIO.LOW)
Then the idea is to modify python code from https://github.com/EdjeElectronics/TensorFlow-Object-Detection-on-the-Raspberry-Pi/ to add this spray activation logic!
And some opencv code to add nice text in detection window:
Et voila!